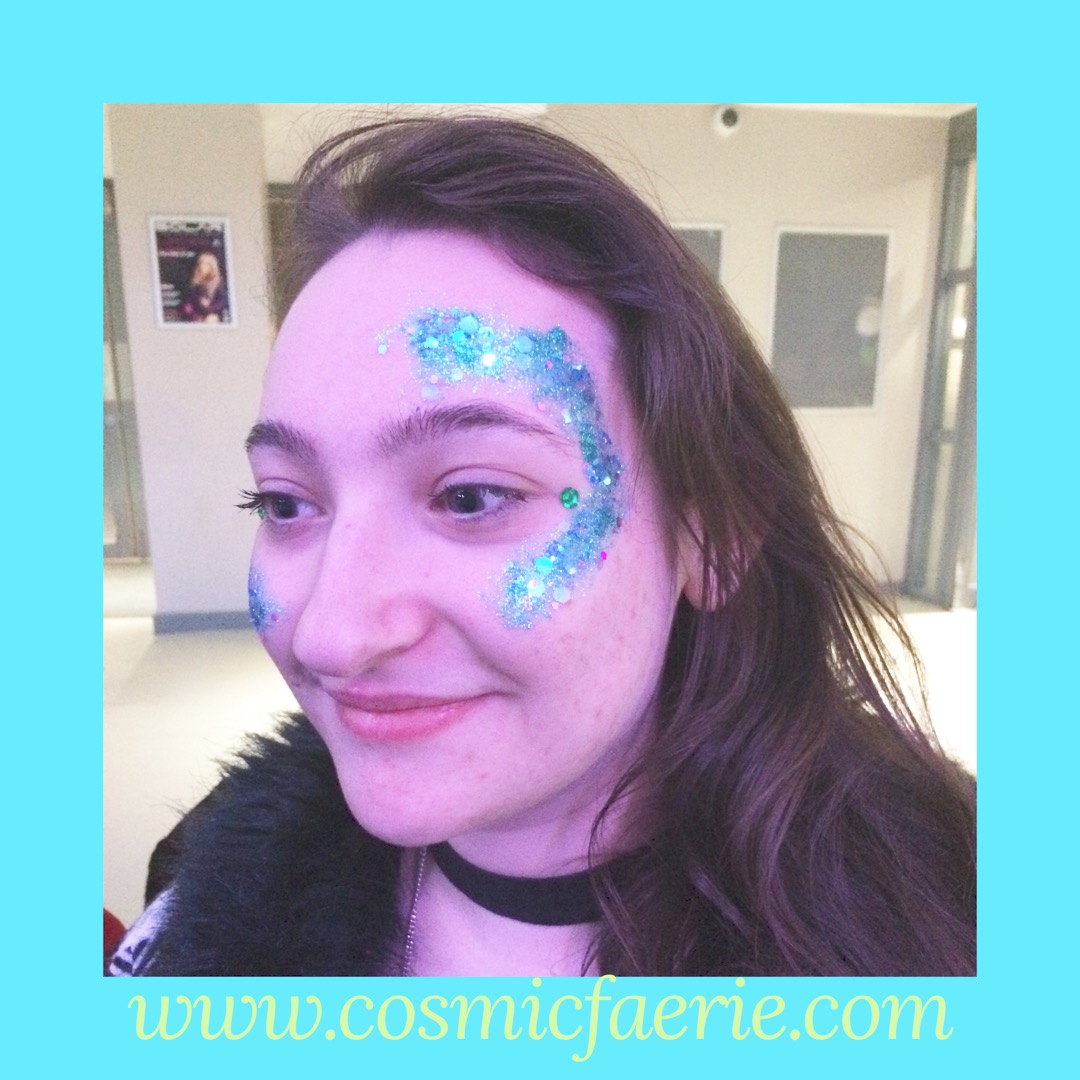
Cosmic Faerie has had an amazing first year in 2018!
We want to thank everyone that supported us, by booking, sharing, referring and interacting with our posts of Facebook and Instagram.
I am so excited that I am doing what I am passionate about and what I love. I believe that it shines through when I attend events and parties. Here are some of our fabulous reviews from 2018!
“Wow !! Everyone should have Louise at their party she is AMAZING!!! The kids and parents loved her ❤️ and we did!! So much so two days later and my five year old at the breakfast table this morning piped up… you know the face painter I love her mummy can she come again??! Not only is Louise really talented but so warm and lovely with everyone. I’ve never met her before and she could see as soon as she arrived I was stressed with my first ever party for my son and she gave me a big hug and it really lifted me.
Also I would like to add she’s very clean and tidy and left no mess and caused no bother at all. Highly recommend her and will spread the word so she can touch other people’s lives …. 😘 Thankyou so much for making my sons party extra special… will definitely mither you again xxx” Adelle Dellie Williams via Facebook
“Amazing face paints and everybody loved you Louise! Thankyou so so much for all your hard work and making my party extra special! Highly recommended to anybody of any age! 5🌟 work!”- Sarah Davenport Via Facebook
“Thankyou so much for being at our daughter’s 5th birthday party. You’re so talented. Would highly recommend and will definitely be using you again xxx “-LM Biss -Via Facebook
“Louise and her friend came to my school’s 50th birthday party recently and despite the heat and busy-ness of the afternoon, they did a fantastic job to paint and glitter so many people! Everyone looked amazing and I saw lots of happy, smiley faces all afternoon! Thank you both!” – Angela Stapleton via Facebook
“Faultless work and the icing on the cake to a great party!everybody loved your work and we have heard nothing but praise about everybodys face and body art! thankyou!🌟⭐🌟⭐🌟”- Peter and Wendy Davenport via Facebook
“lovely friendly lady, very approachable for the kids. we met her at my daughters school friends party. My daughter’s faces looked amazing and paint came off easily without staining their faces. she got through all the children at the party each face looking just as amazing. Thank you.xx”- Sam Matthews via Facebook
You can check out the rest of our reviews on our Facebok page, our AddtoEvent profile or our Google Business page.
Hey and welcome to today’s blog post (more of a list)!
Below is a list of suggested suppliers that I use and would recommend for face painting and glitter purchases.
The majority of these suppliers I use myself. There are a couple on here I haven’t purchased from, but they come very highly recommended from other face painters. (Please note none of these are affiliate links, they are just suppliers I love).
General face painting suppliers
Magic Box face paints– Magic box has excellent customer service and is one of my favourite places to shop!! I always find what I want as their selection of paints is MASSIVE! They also supply glitter (including bio) & tattoos, large custom one stroke kits and palettes, special FX and loads more! Pop over to their site and have a mooch.
Face paints direct– Another great store with an excellent selection of paints and supplies.
The Face painting shop– The Face Painting Shop is another great one stop shop for all your supplies.
Dauphines- I haven’t shopped at Dauphine’s for a while now, but they definitely need a mention as their customer service is so great! I still remember a call I had 5 years ago with a gentleman that worked there. He was exceptional and really brightened my day.
Yorkshire Face Paints– I placed my first order last night! I have only ever heard amazing things. Lots of painty, as well as bling supplies and double sided medical tape. Donna also does some ace tutorials on her Facebook page too.
Festival Glitter
Rainbow Sparkles– Their glitter gels are to die for! They are heaped full of sparkles. They also do some amazing coloured fine glitter too which is great for tattoos. Rose who sells rainbow sparkles really knows her stuff and often does glitter demos on her Facebook page.
LG London– a massive selection of festival, fine and bio glitter with bling added in too, all at very reasonable prices. Definitely the place to shop if you are putting together a glitter bar.
Cazi’s Crafty Creations– Has just started selling her own glitter pots and mixes. She is adding bio glitter to the catalogue soon!
Bio Glitter
Glitter Lution– The original bio glitter. A massive selection including different sizes and mixes.
Bespoke One Stoke Palettes
Sally- Ann Lynch– Sally’s palettes come in an array of original and beautiful colours. I believe if you have a specific request you can get in touch with her to order.
Cazi’s Crafty Creations– Cazi has recently started making bespoke palettes, and people on the painty Facebook groups are loving them. Her main palette includes all the one strokes you need to get started.
Practice Boards
Sally-Ann Lynch- Loads of sizes, good quality and great to use as a display. Sally does a large A2 board with 12 faces on that is excellent for this.
The Fancy Fairy Boards- Great and affordable practice boards. I often decorate my plain A4 boards and use them as signs that are part of my display.
Cases and kits
Craft N Go– Craft N Go are awesome paint stations made specifically for face painters. They are imported from America and are on the pricey side, but man they are beautiful, sturdy cases in amazing colours!
Fantasy Face Paint Case- I haven’t had the pleasure of using the Fantasy face paint case, but I have heard great things. Emma and her husband who supply the cases have great customer service and reply quickly to queries.
Glitter tattoo suppliers
Glitter Body Art Online– Their glitter tattoo stencils are the cheapest I have found. They have a huge selection of glitter including festival and bio glitter at awesome prices. All my orders from them have always arrived quickly and well packaged.
If you are thinking about getting a few face paints or putting together a small kit, but are overwhelmed by all the options, then this post is for you.
There are so many different brands, pallets, cases and types of paint, it can be really confusing. A lot of painters start out by practicing and using Snazaroo’s mini party sets. These sets are readily available for around £15. They are great if you want to get a feel for face painting, but the small volume of paint included in the kit does not last very long.
I originally started with one of these to practice with, I then picked up the colours of the rainbow along with a black and white and made my own mini kit. I repotted the paints from the small kit and from the larger colours, made rainbow cakes and popped the remaining individual colours in to a small craft box. These can be purchased from craft stores and places like Home Bargains & Poundland.
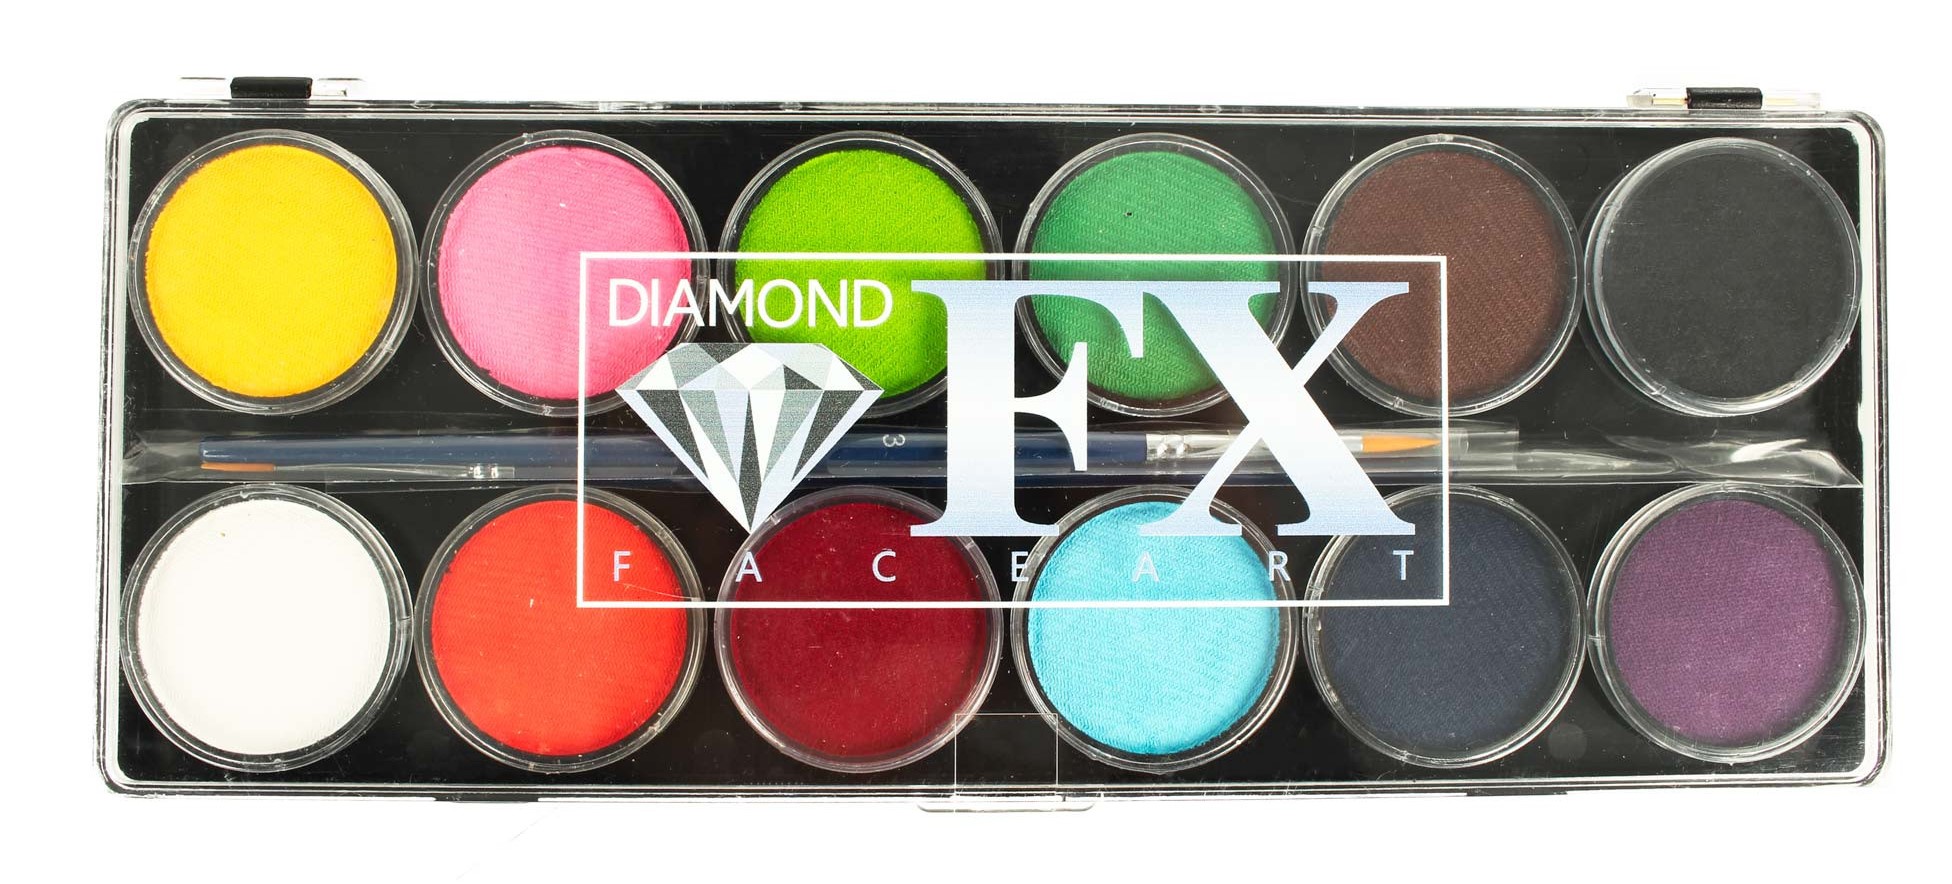
Once I started getting invited along to paint at parties and events, I realised I needed some good quality paints and a range of split and rainbow cakes. For this I purchased the Diamondfx palette shown below.
I then also purchased an empty palette and cut in to the individual paints to make my own one strokes. I used this, along with a large split cake, at my gigs the summer I first started. This was my basic working kit.
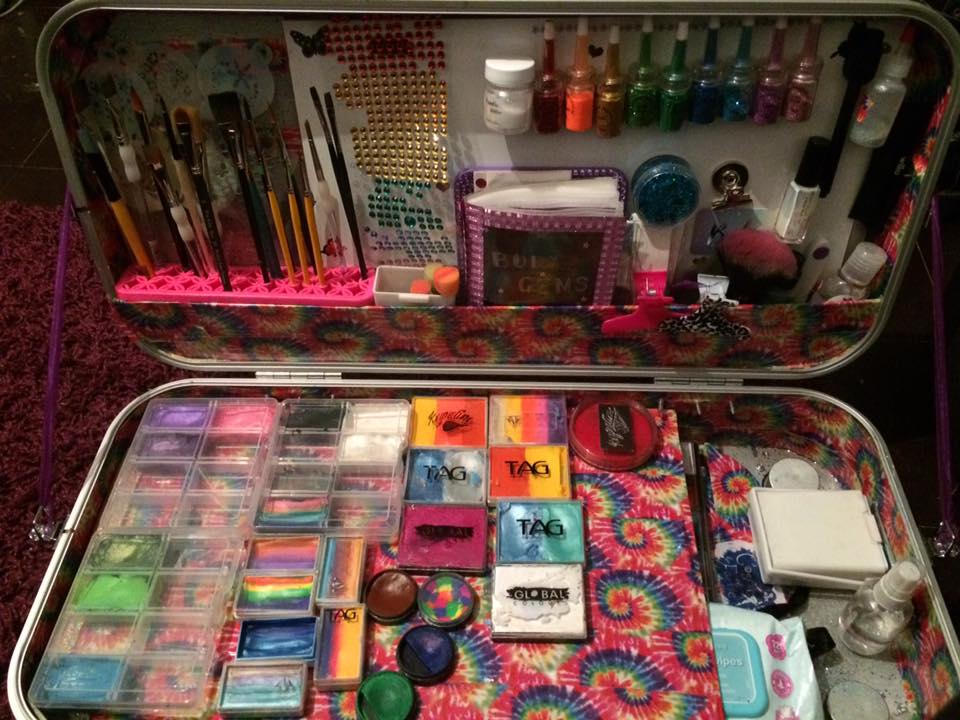
I then went for years without painting (life, university and work took over). When I finally decide to put together a face painting kit and kick start Cosmic Faerie I purchased quality brushes and slowly started to buy individual paint, one strokes and rainbow cakes. I then set up all of this in a DJ Hero case.
If you’d like some information on how I converted my case check out my blog post here
For my latest set up, I have invested in a CraftnGo. I love it as it is colourful and bright and fits in perfectly with Cosmic Faerie colours and branding.
To round up, the items below are a great place to start if you’d like to invest a little more than a small Snazaroo palette, but do not want to buy everything in sight (but let’s face it most of us do as there as soooooo many pretty colours!)
A good black and white for line work- Diamondfx is perfect for this
Some basic colours, blue, green, red, yellow, orange, pink & purple. (I have never purchased large brown or grey paints, as I have found a lot of the designs I do don’t require them much. When I do need them I mix my own from the colours I have available). You can purchase these in a kit such as the one I used to start
Stencils. Don’t go mad, just a few basics to help enhance your designs such as stars, snow flakes, skulls or hero logos are helpful.
A water pot (a dual or triple water pot is helpful although not essential)
Good quality brushes. Some people love brushes and collect loads, but I find that have around 8 or 9 brushes I use regularly. It is good to practice with different sizes and shapes, but you only need the basics to get started. For ages I used the DiamondFX round brushes that came with the palette. Saying that, I must admit purchasing a few high quality brushes has really helped me to improve my painting. A round 1,3 & 5. A ½ inch flat brush and a ¾ inch flat brush & a petal brush. Lowel Cornelle and The Face Painting shop’s brushes are my favourite.
Sponges. I pick up baby sponges from my local Wilkos, Tescos or Savers. They are around 50p each and I cut them in to 4 pieces. The rounded edge fits perfectly in to rainbow cakes.
Some basic one strokes and rainbow cakes. If you have limited funds try just a few to start with. These ones are always helpful: a rainbow, a green for leaves, Reds and yellows for fire and one stroke Spiderman designs, a blue for the sea and Frozen designs, shades of pink to use for creating roses, and a typically ‘girly’ colour that can be used for Princess crowns and unicorns. If you already have single colour paints you can make your own split cakes, there are lots of tutorials on YouTube that will show you how to do this. If you’d prefer to buy your one strokes ready-made, Global colour make some brilliant palettes that contain all of the above combinations and extras. .
I hope this has helped! Feel free to comment with any queries or questions you have.
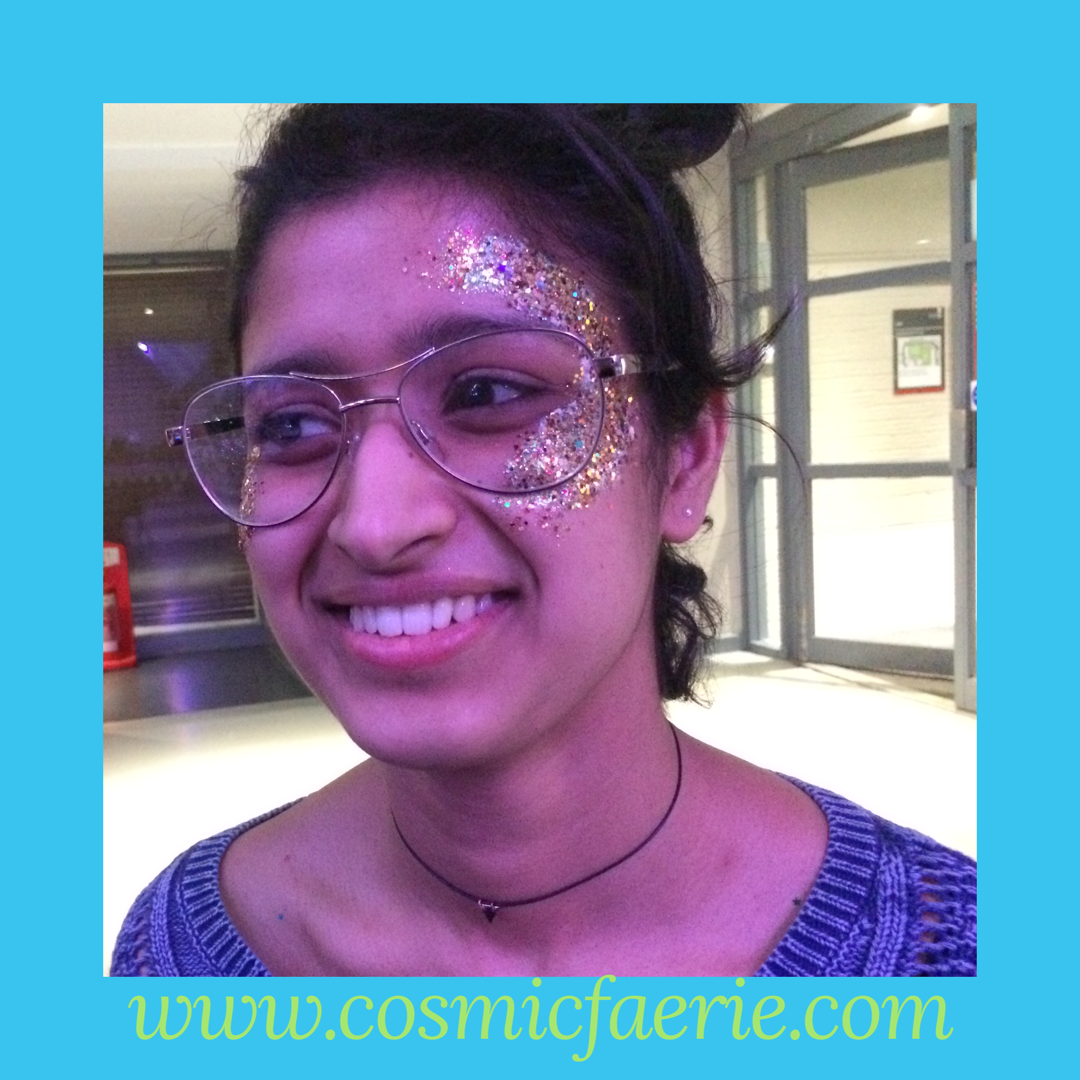
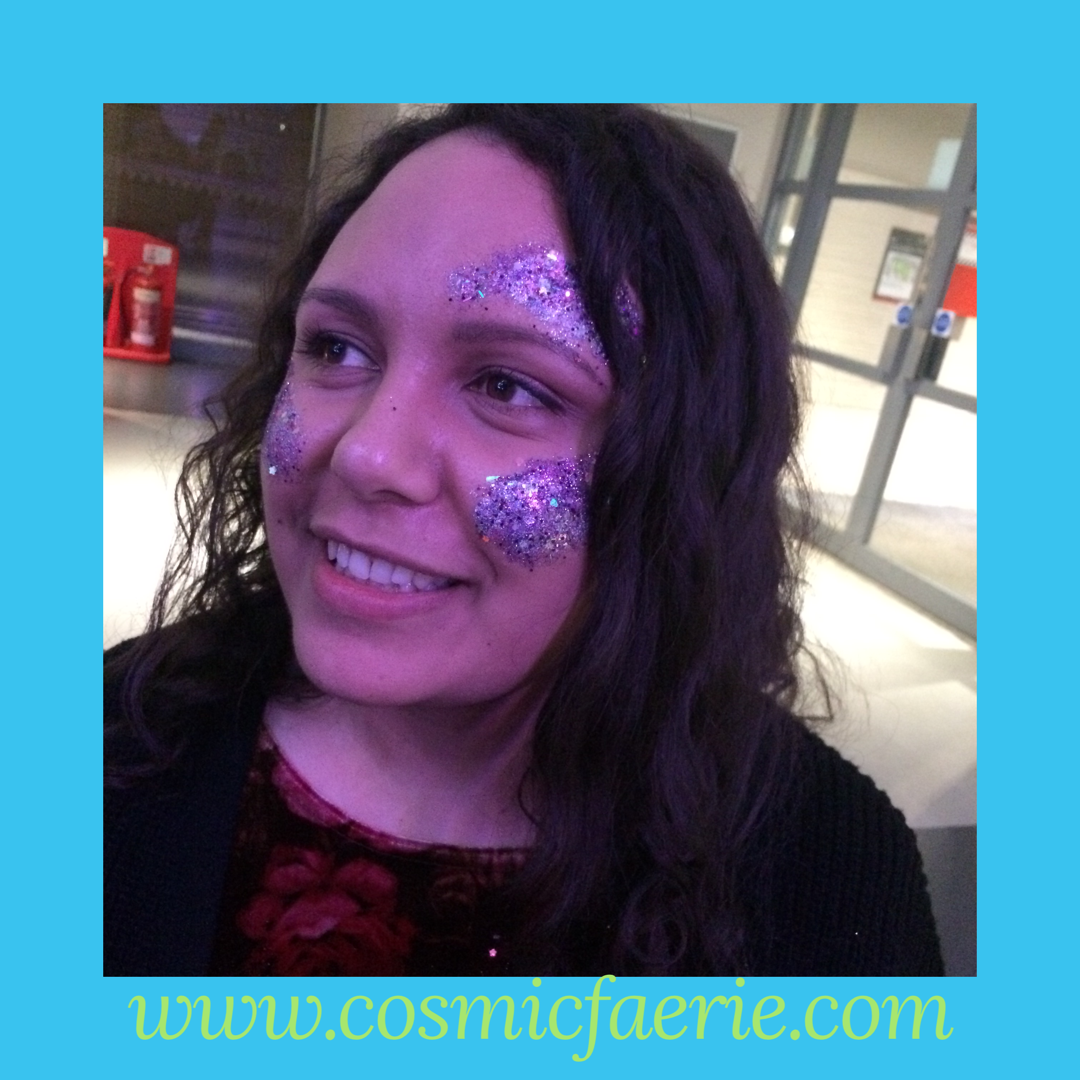
We took our Glitter bar out for the first time last Monday! We attended the ‘Proud to be Us’ fashion show (previously named Diversity Fashion Show) at Staffordshire University.
Check out these sparkly beautys!
The emphasis in the show is diversity! Everyone’s individuality definitely shined through.
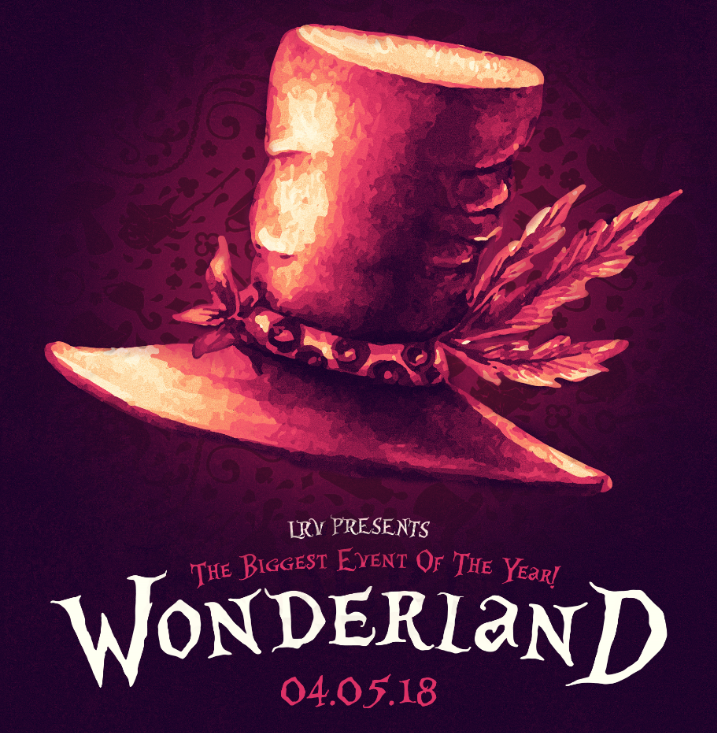
There were walks that included the Betty Smither’s collection from the 1950’s and 1960’s, festival inspired walks such as Download, Coachella & Glastonbury, a Afro-Caribbean walk, and then the final walk, which revealed the Wonderland theme of LRV’s Final Friday. Get your tickets here
Thank you very much to Charne’ for inviting me along, and all the great models and dancers for making it an amazing evening.
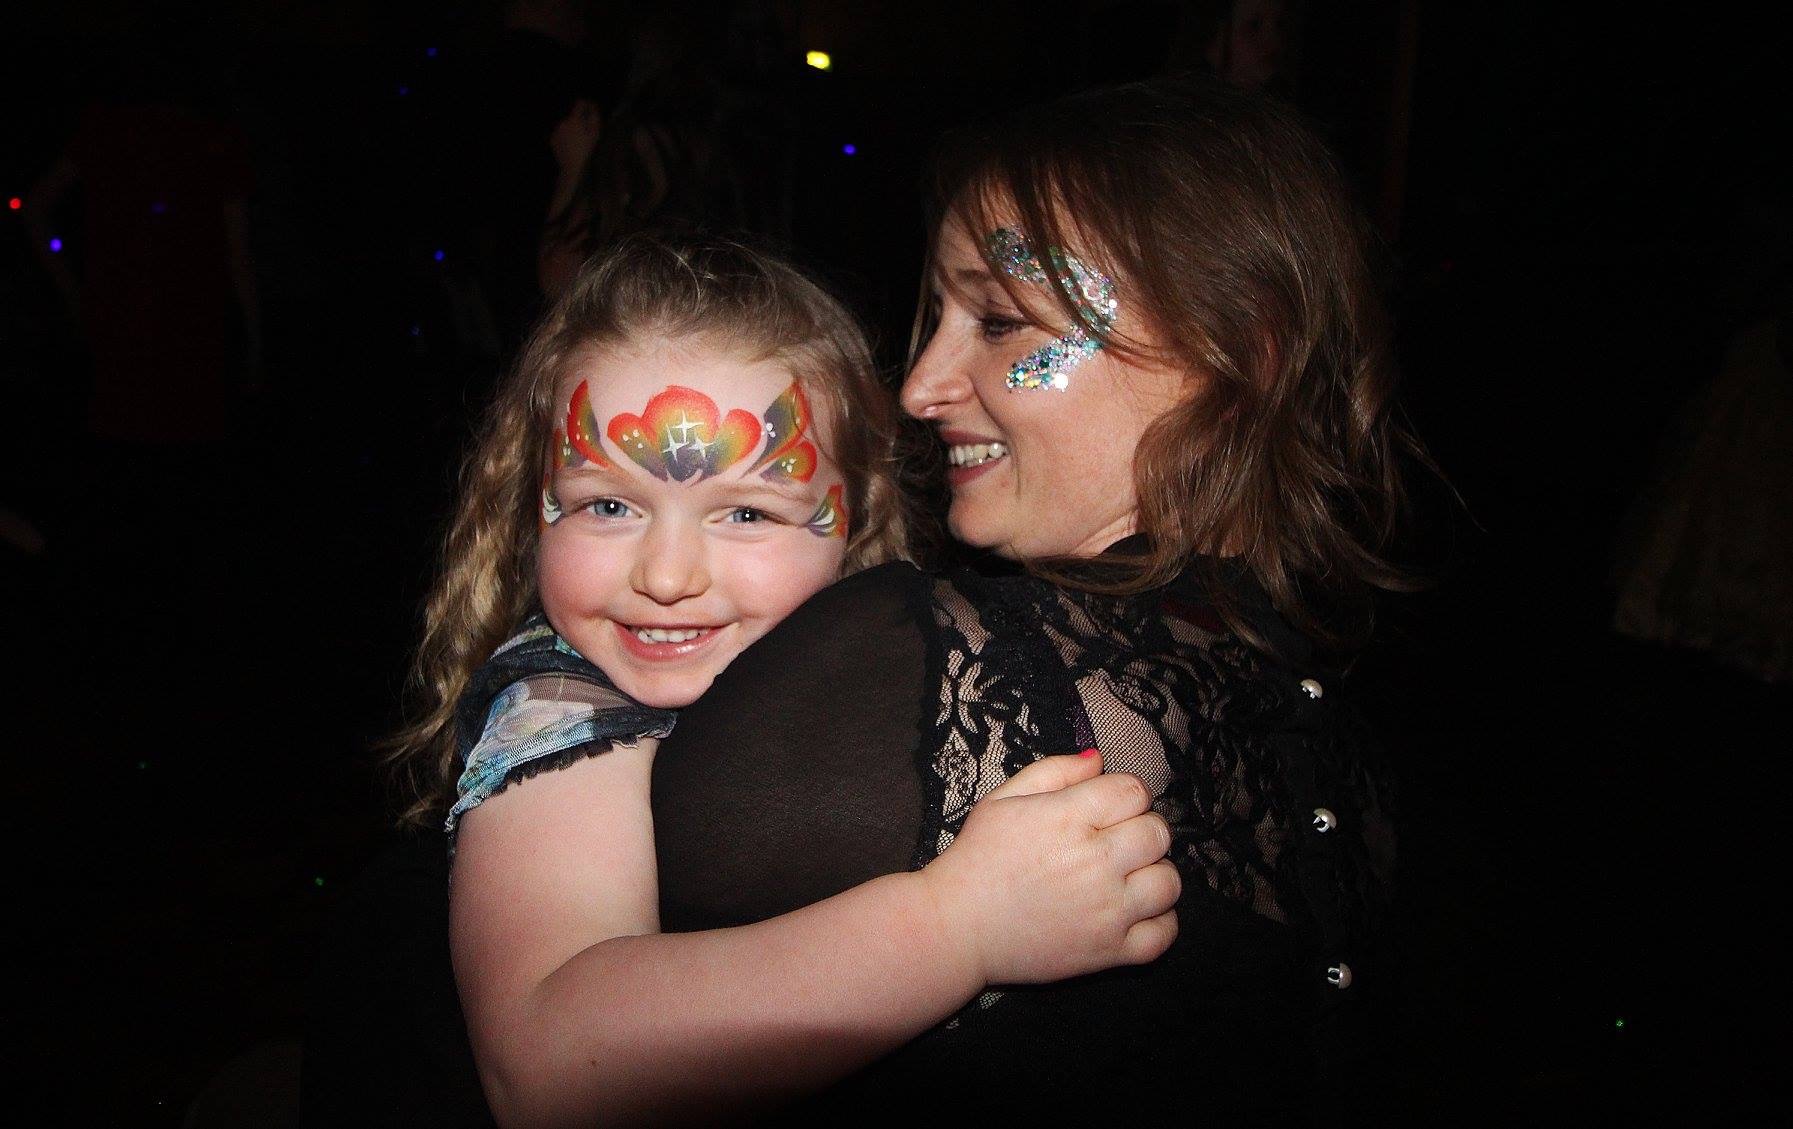
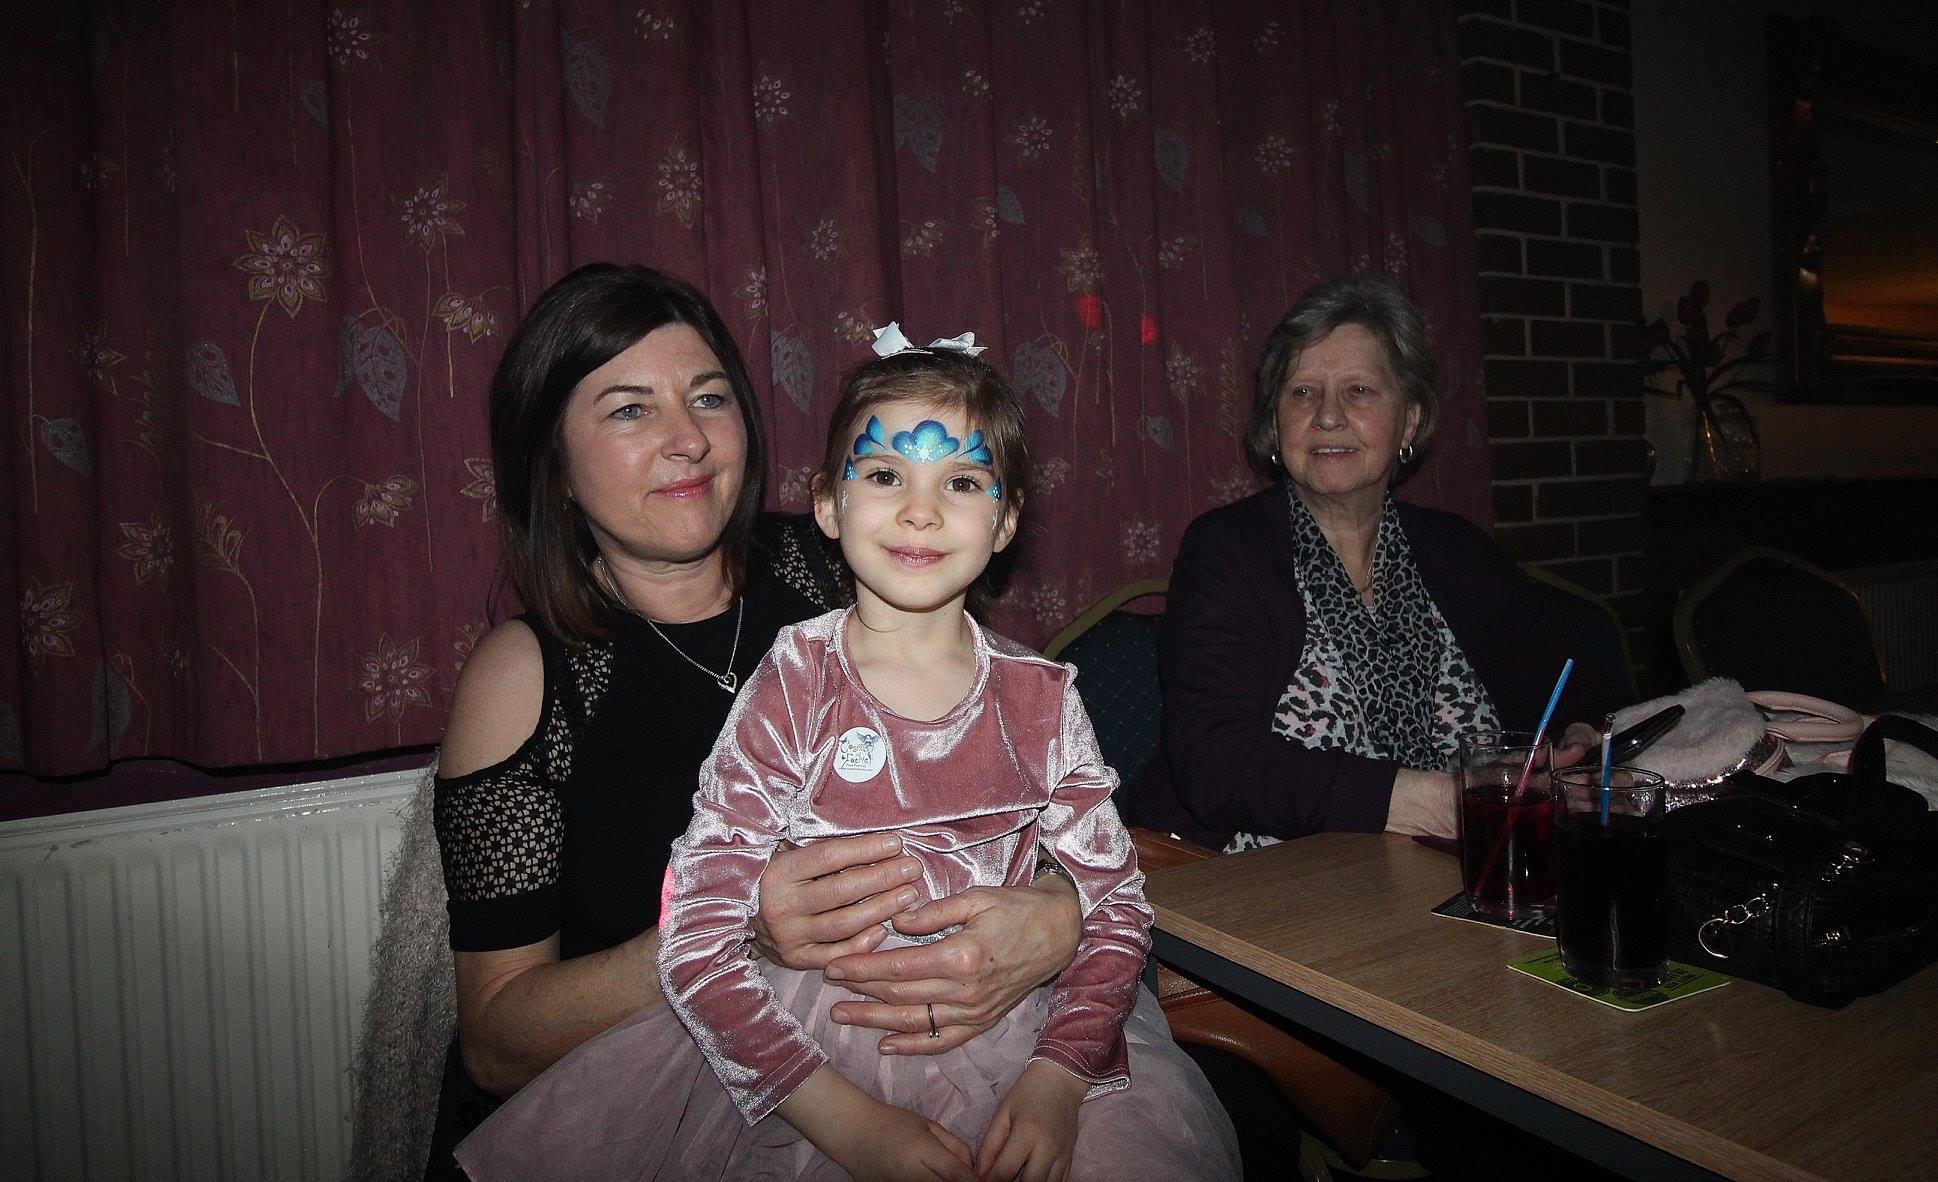
Last weekend Cosmic Faerie was lucky enough to be invited along to a family disco in Rugeley, to face paint and glitter tattoo, in aid of Max’s Mission to Move. Check out Max’s story and upcoming events here.
This is the second event in aid of Max’s Mission I have had the pleasure of attending. I had an awesome night and painted for around 2 and a half hours solid! I then went on to twist a few basic balloon designs for donations! We managed to raise just over £15 in donations on balloons and with a portion of the face painting profits, we managed to make a donation of £50 which we are really pleased with!
Thank you so much to Andrea, and Cameron from Epic Sounds Disco for inviting Cosmic Faerie, along and well done and the grand total of £1600!
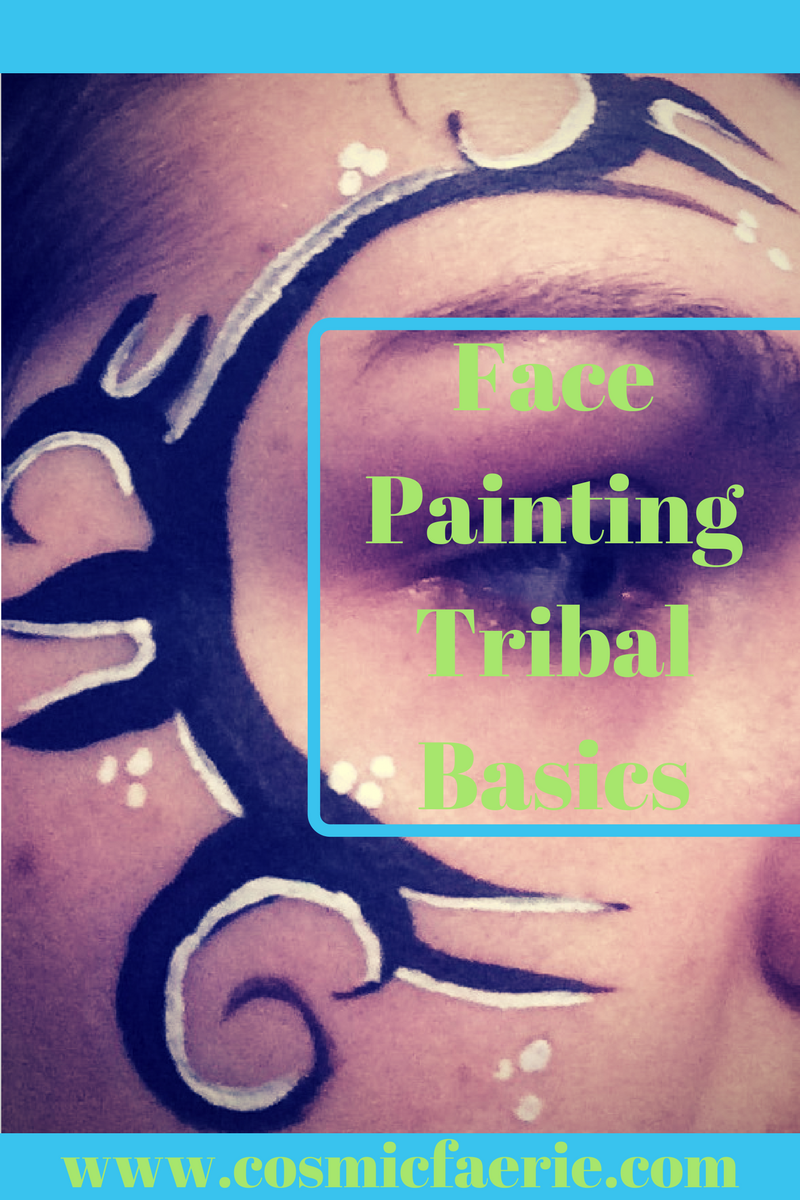
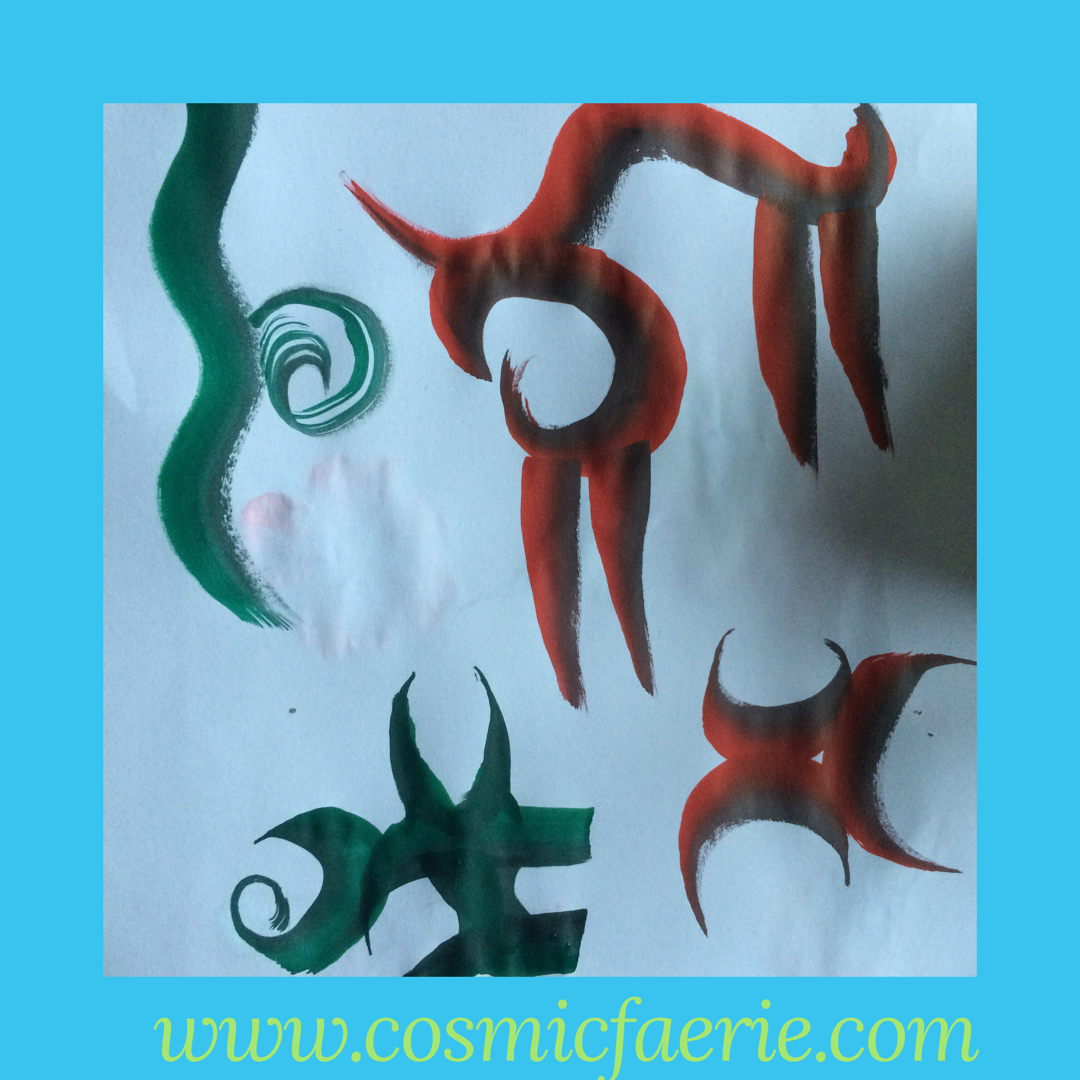
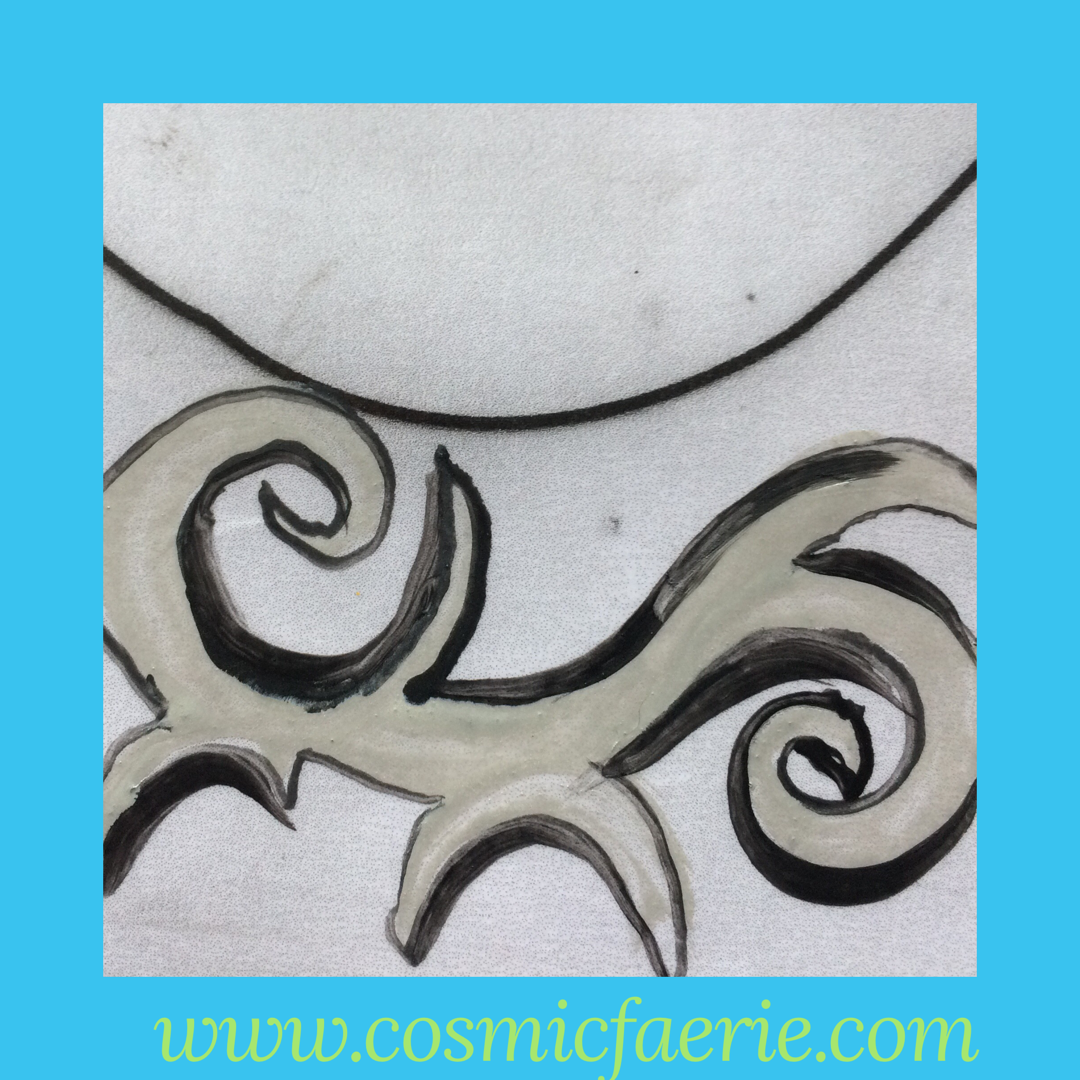
Hi and welcome to this weeks ‘paint with me’. This week’s focus is going to be tribal. When it comes to tattoos tribal is everywhere! Down legs, and arms, making up intricate large pieces. It looks so simple and so complicated all at the same time.
Coming from someone that is obsessed by swirls, you think I’d have attempted tribal well before now, right? Other than a half-arsed attempt as a teenager to cover my friends back in swirls (which may I add did not look as good as I had imagined), I haven’t really tried it much before, so this week, I practiced, and practiced (yep back to that word again, we all have a love/hate relationship with it!). Some turned out pretty good, some not so good, and as always; I show the good and the bad.
There was a particularly good video on YouTube by SparklingFaces, and some inspiration I found on Pinterest that really helped with tribal painting. (If you’d like to follow my tribal board you can check it out here: Cosmic Faerie’s Pinterest-Tribal board.
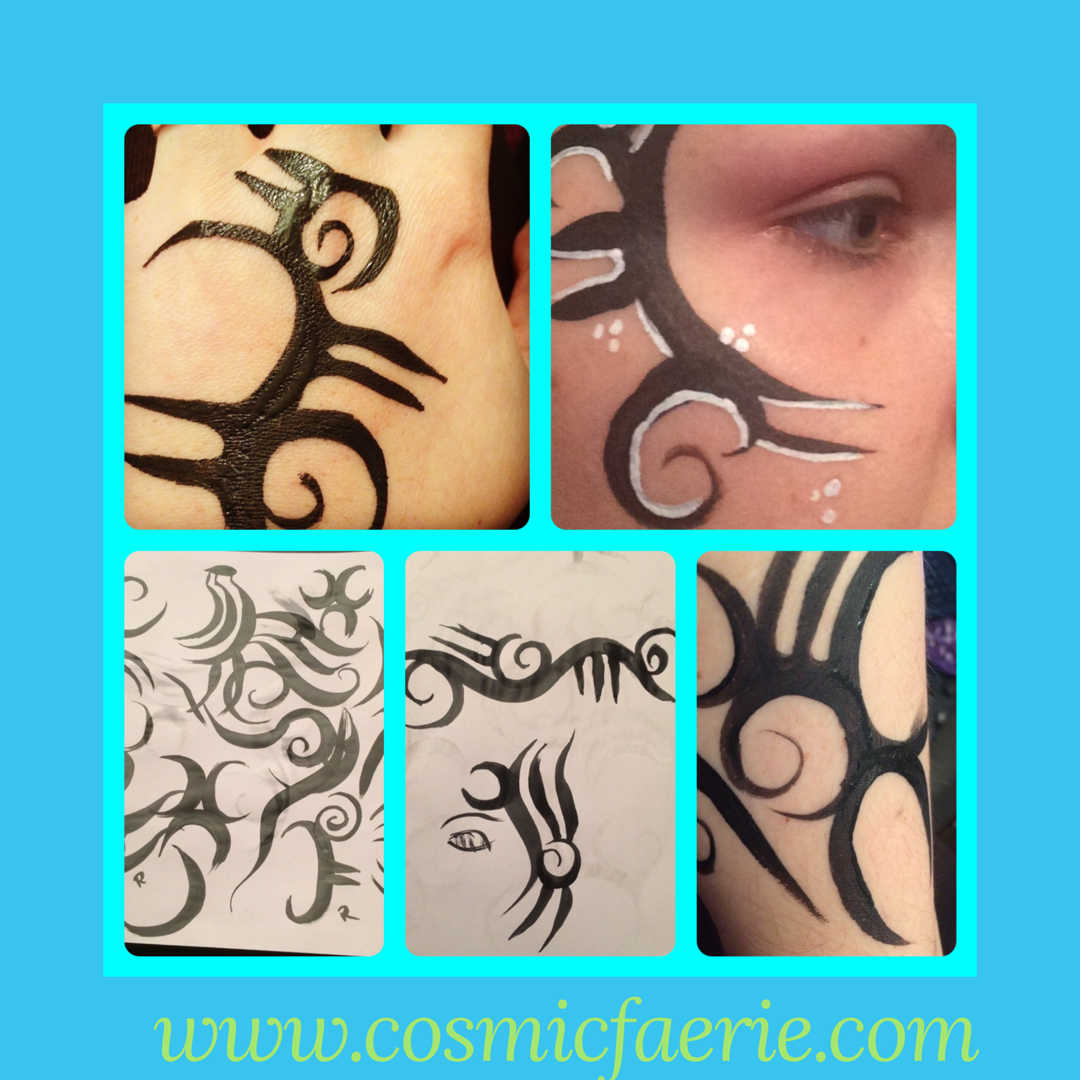
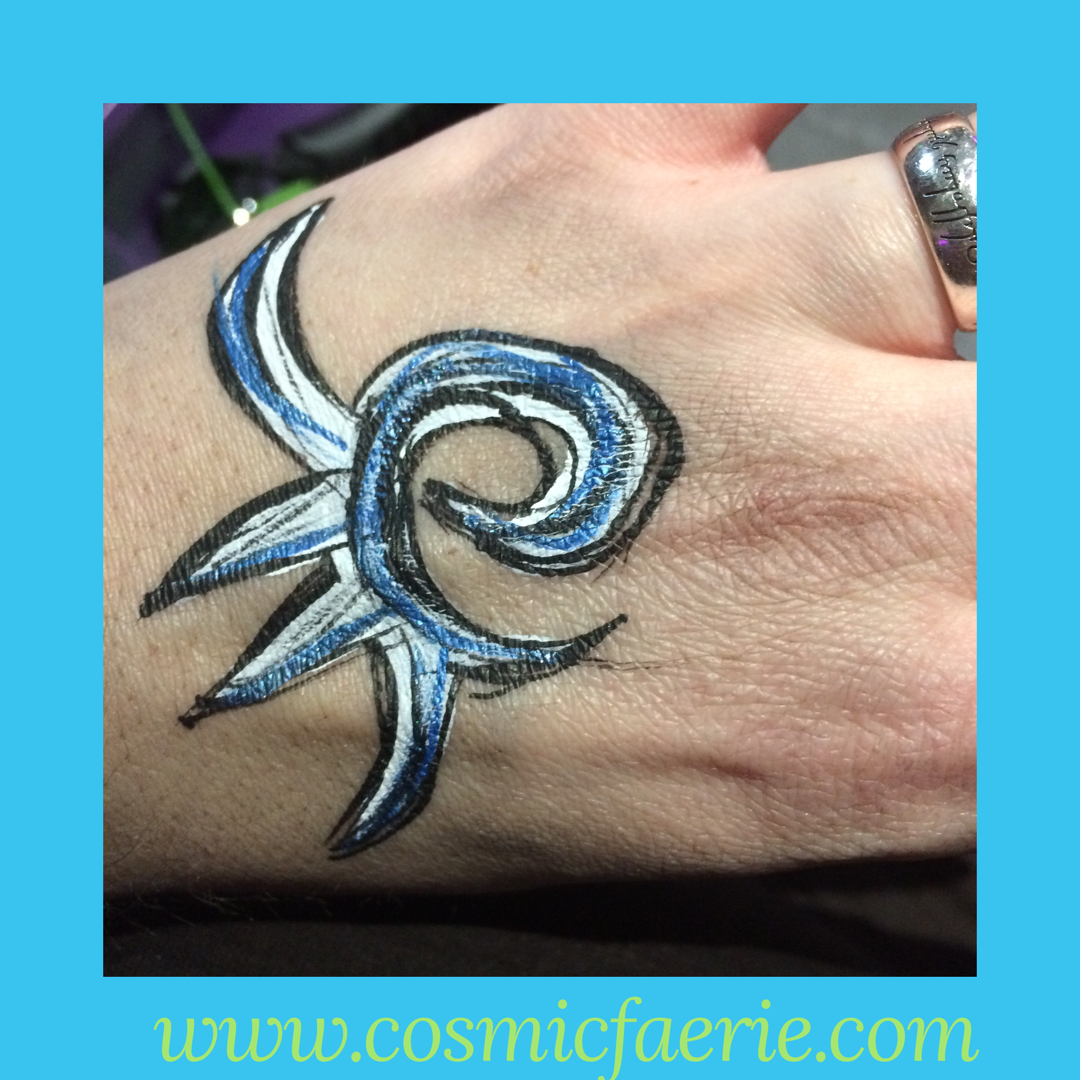
Then out comes to brush and the black paint! Ooooo but what brush is the question? I tried a few this week; The La Corneille Flora , the Loew-Cornell yellow handle number 5 and a flat ½ inch brush. The one I used was Royal and Royal and Langnickel which is a cheap one I picked up until I can afford a lovely one from The Face Painting Shop. The favourite was definitely the La Corneille flora. This is a brush a purchased and was taught how to use by Juliet Eve from Façade academy. You can check out her awesome training classeshere.
As you can see from the video below, the brush holds paint well up close the the ferulle, so keeps going for longer (which is handy when you are getting carried away with the curly swirlys), it is able to produce a very fine line, but also a very thick one. Excellent for tiger stripes when you need thick to thin (abbreviated in the face paint community as TTT). This brush is excellent for creating the thick to thin C’s and swirls you need when creating tribal. As mentioned above I did test a round brush, which also worked well, but it didn’t have the contrast that the flora had.
Fancy picking up a flora brush? You can do so here: Flora Brush
As mentioned, I also tried and ½ inch brush. I had this bright idea that I could get some lovely one stroke colours, looking all blended and tribally. The verdict was: I couldn’t. I believe with a bit more practice and brush control that I still might be able too, but I still prefer the flora. Quick and easy and I can add highlights too. Here are my ‘attempts’.
I found when using black as the base colour and highlighting with white it was muddying and going wrong, like the one below (although I managed to do one that looked okay). I am pretty terrible at highlights, and normally prefer to just use dots.
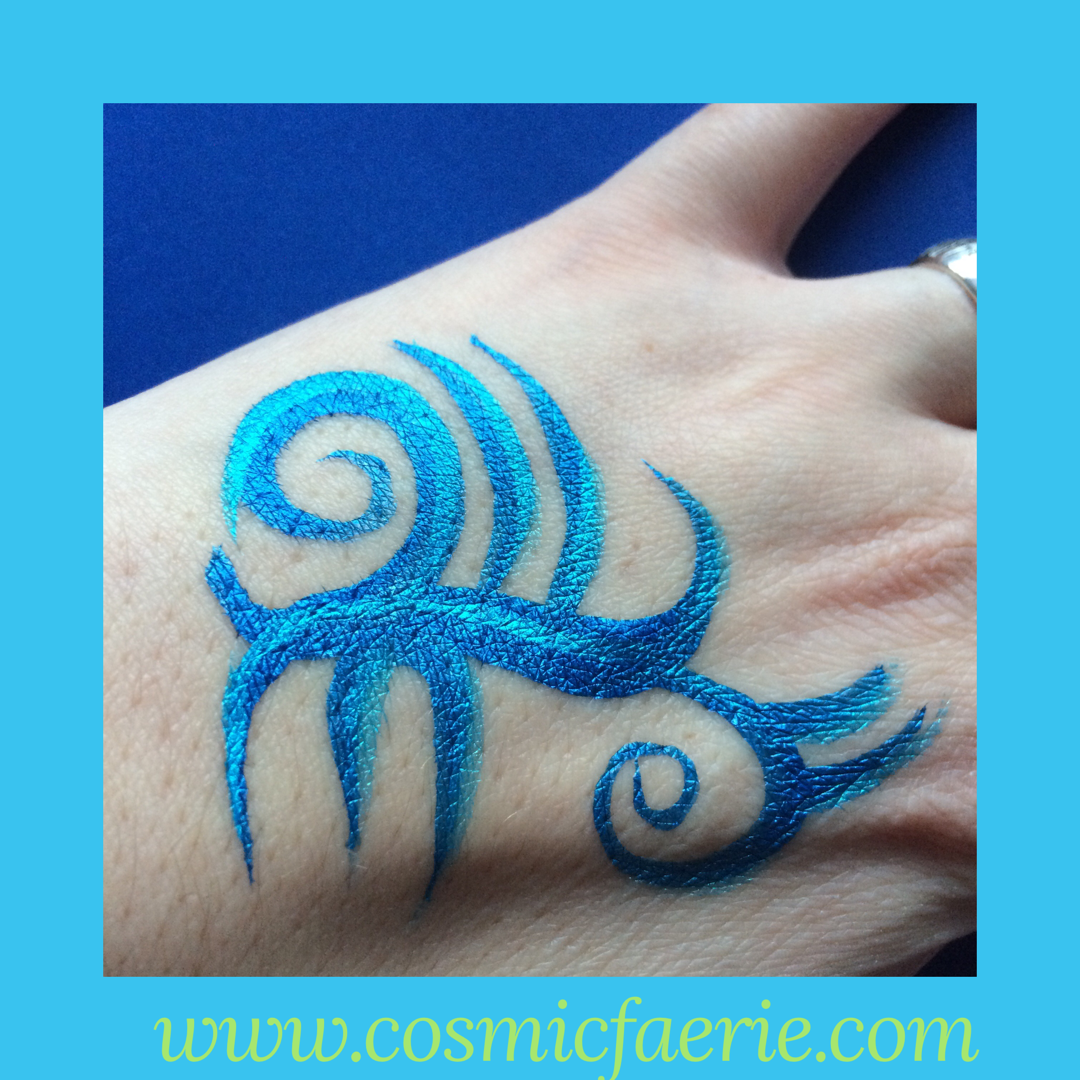
Saying that, I did try some tribal designs in metallic colours with highlights, which I thought looked pretty effective.
This one is Superstar’s (Fab in the USA) ziva and Tag’s pearl blue.
I would say play around with colours. There is no excuse not to practice, you don’t have to haul all of your face painting things out. One brush, one colour and some water and you are ready to go!
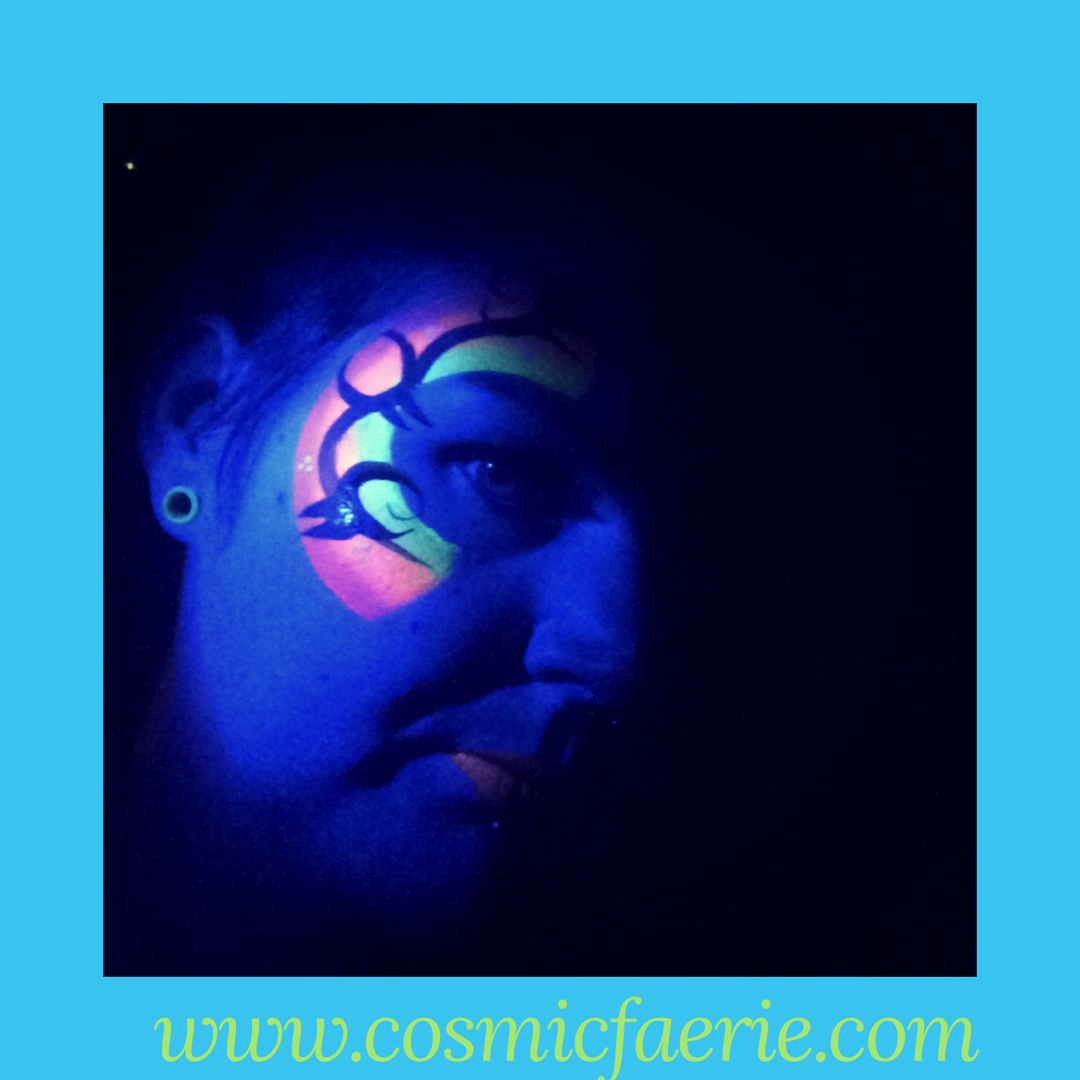
I also tried UV one stroke and tribal. I used the pink, orange, and yellow side of a the DiamondFX Neon Rainbow split cake, and a 1 inch flat brush to make a C shape around the eye. I then painted the tribal design on top of this with a normal black. The UV glows really well, behind the dark tribal design.
Tribal desings are really popular, so they are ace brilliant to use on teenagers and as part of graffiti arms.
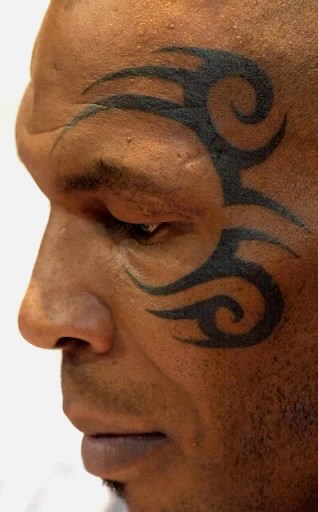
Check out Mike Tyson’s tattoo. It seems that this design is quite popular, and images of it painted on in various ways crop up all over the internet.
Once you get the basics down you can experiment with colour, add gems and glitter and really get some ace effects, brilliant, quick and colourful for the festivals!
You may have noticed on a lot of face painting groups people talking about their DJ Hero kits.
The DJ Hero is a game that was released with a DJ deck that came in an awesome box with legs. These boxes make brilliant face painting kits with just a little work.
Below is my video that shows you how I converted my DJ Hero case. Enjoy!
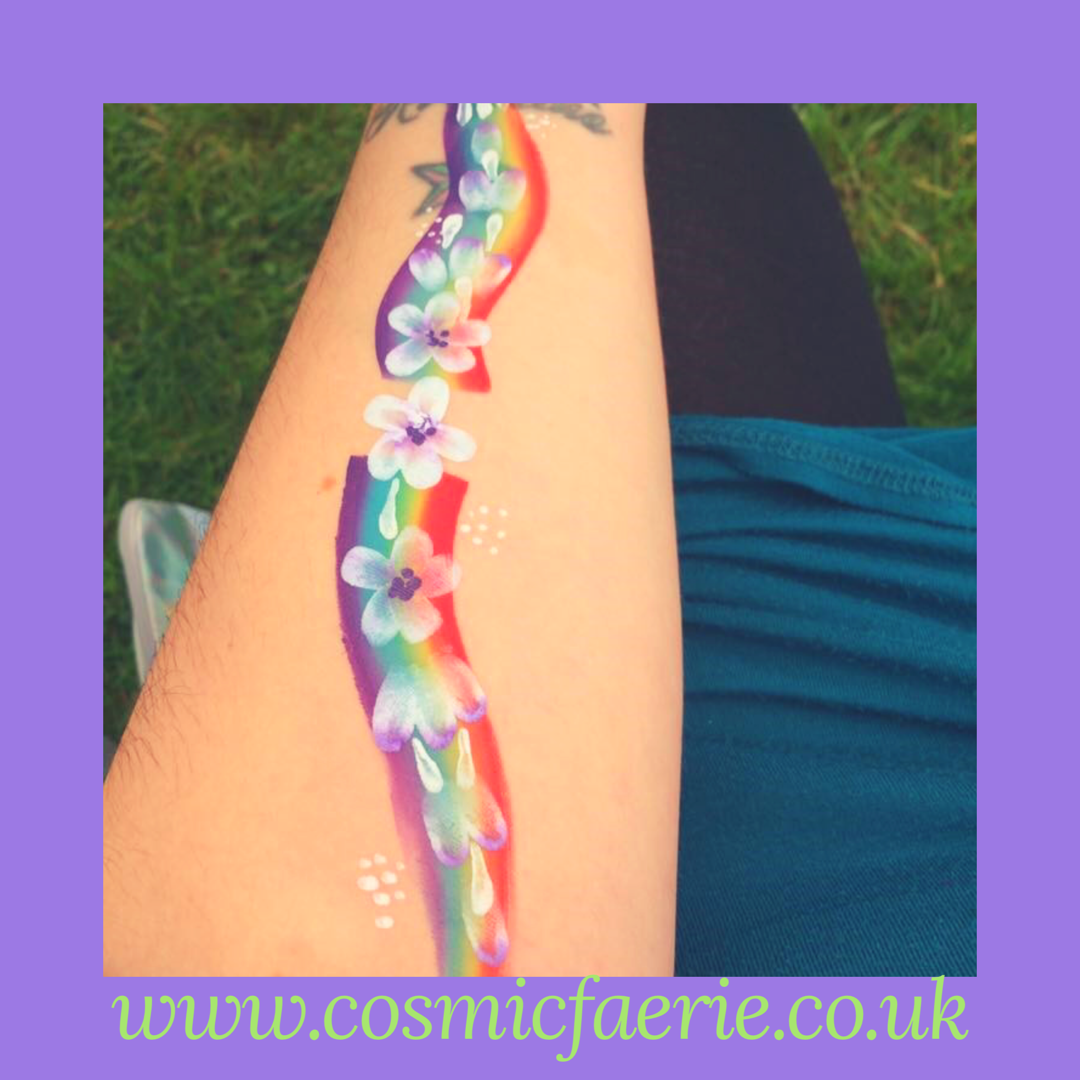
Hi everyone! The first week’s ‘paint with me’ focus is flowers.
They are popular with all ages, come in different shapes, sizes and colours and are very versatile. You can use them to make whole crowns or hippy festival bands, or use them to jazz up designs.
Some are so intricate that they take my breath away and I think ‘wow, I will never be able to paint like that, I WISH I could paint like that’. Let’s face it we all need to start somewhere.
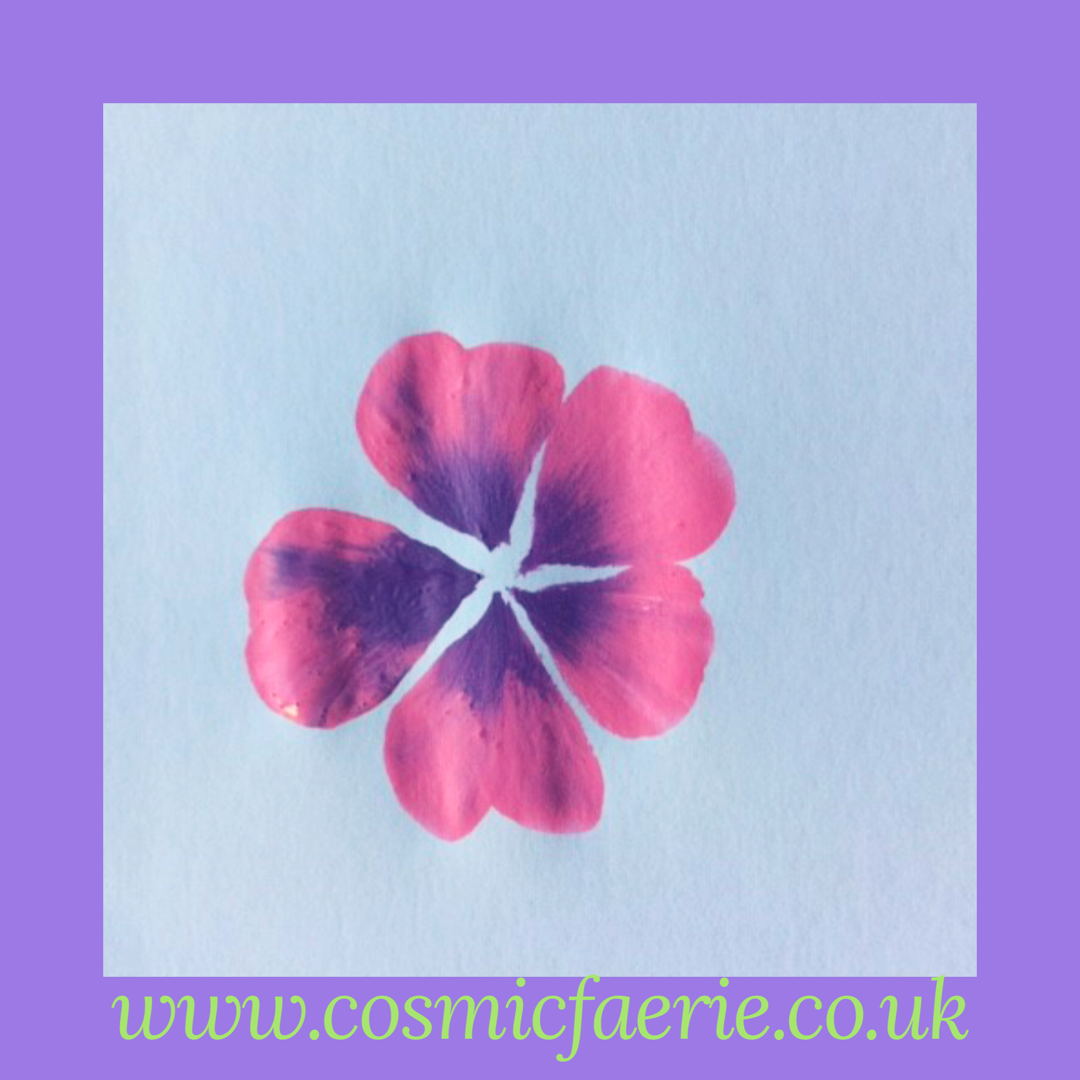
Here are my flowers in the very early days:
Not that impressive right? Although may I add, I thought these pink and purple double dip flowers were the bee’s knees.
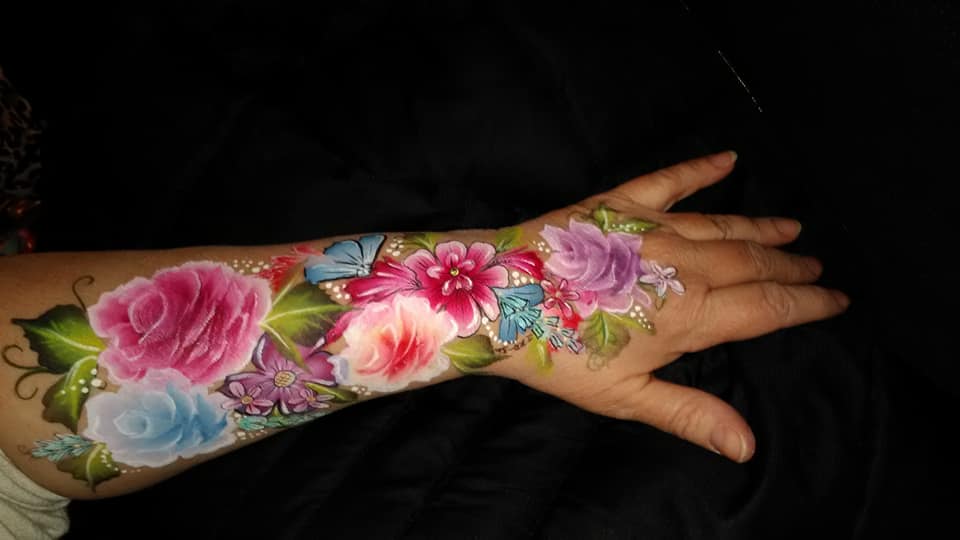
Let’s face it though, When you are achieving this, and want to be achieving something like the image below, it is really disheartening.
This amazing piece is by Amirah Alasmri. She is part of an awesome group on Facebook called ‘Confidence in Paint’. Her flowers and words of wisdom have been a massive inspiration, and helped me greatly with improving my painting. Just look at the beautiful colour!
So how do you get from the first pictures to this beautiful work of art? Practice of course, sounds easy doesn’t it?
It isn’t as easy as ‘bibbity bobbity ‘practice’ booo…. ooooooo masterpiece’, but there will come a time where you think ‘wow, I am liking this, my work is coming together’.
This is the point I am starting to get to, slowly. Which is why I have set up this blog. It is often disheartening seeing so many masterpieces when your double dip flower (I will explain what that is further along in the post for those who do not know), looks more like a misshapen colourful blob! I am afraid my work isn’t yet these beautiful master pieces, but I am slowly collecting the techniques I need to work toward that masterpiece, and that is the bit I want to share.
Remember: we are always harsher on our own work than we are on other peoples, that things take time, and that the journey can be pretty fun.
So, to flowers (please note for the purpose of this blog post I will not be including one stroke roses as they are a whole other level that I will explore in a further blog post).
Lets start with brushes! Where to start?
There are masses of brushes on the market which can be overwhelming when you are new to painting. For the purpose of flowers (or the petals at least), a petal, filbert, cat’s tongue or flora brush all work well.
I use a La-Corneille flora brush in a 6, which you can find here.
I also recently purchased The Face Painting shop mini flower brush and I love it! It makes the most delicate little flowers and the shape keeps beautifully. You can pick yours up here.
In the past I have used filbert and cat tongue brushes that I picked up at the art store. They look good, but having a brush specifically for petals makes a massive difference. They can be quite expensive, but they are definitely worth the investment.
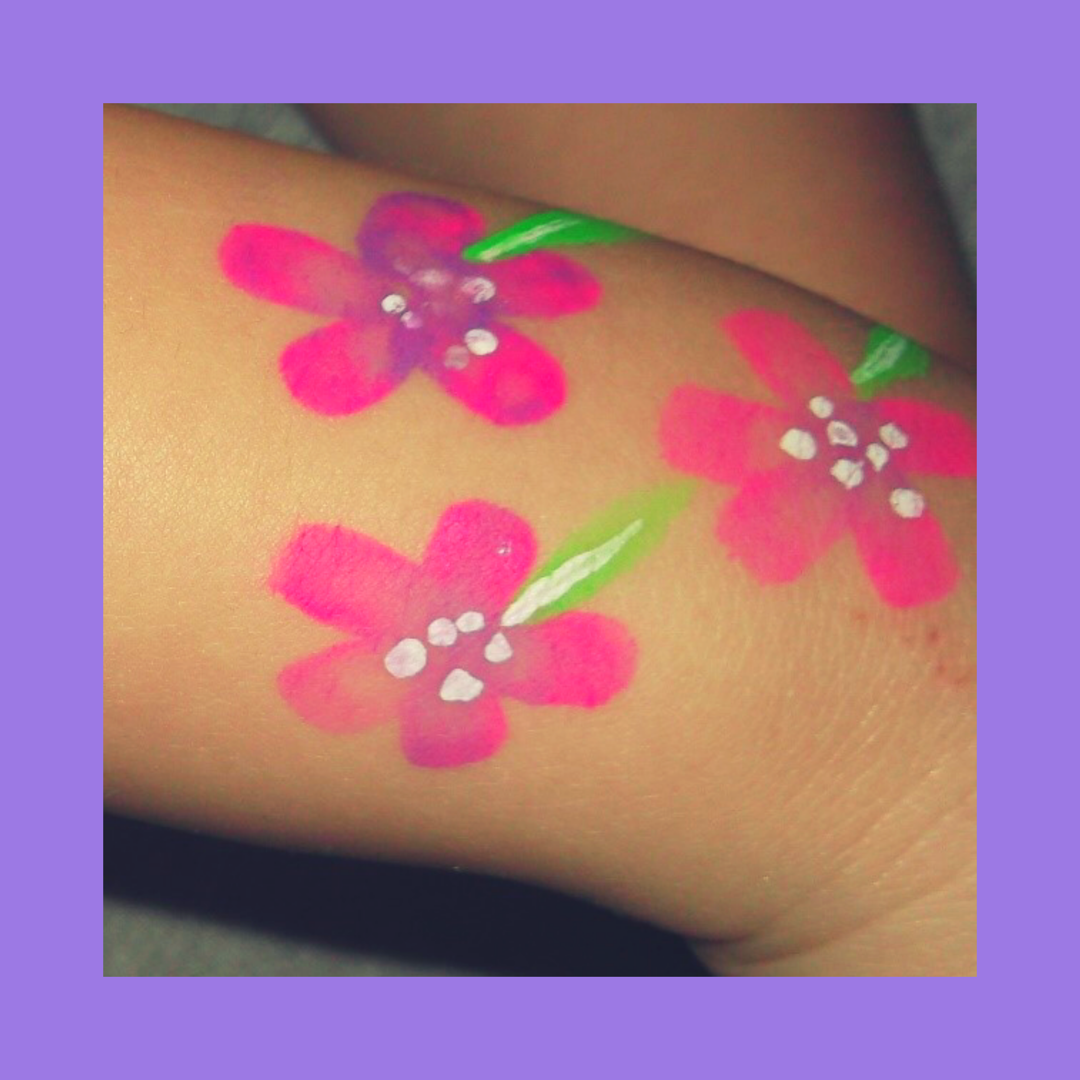
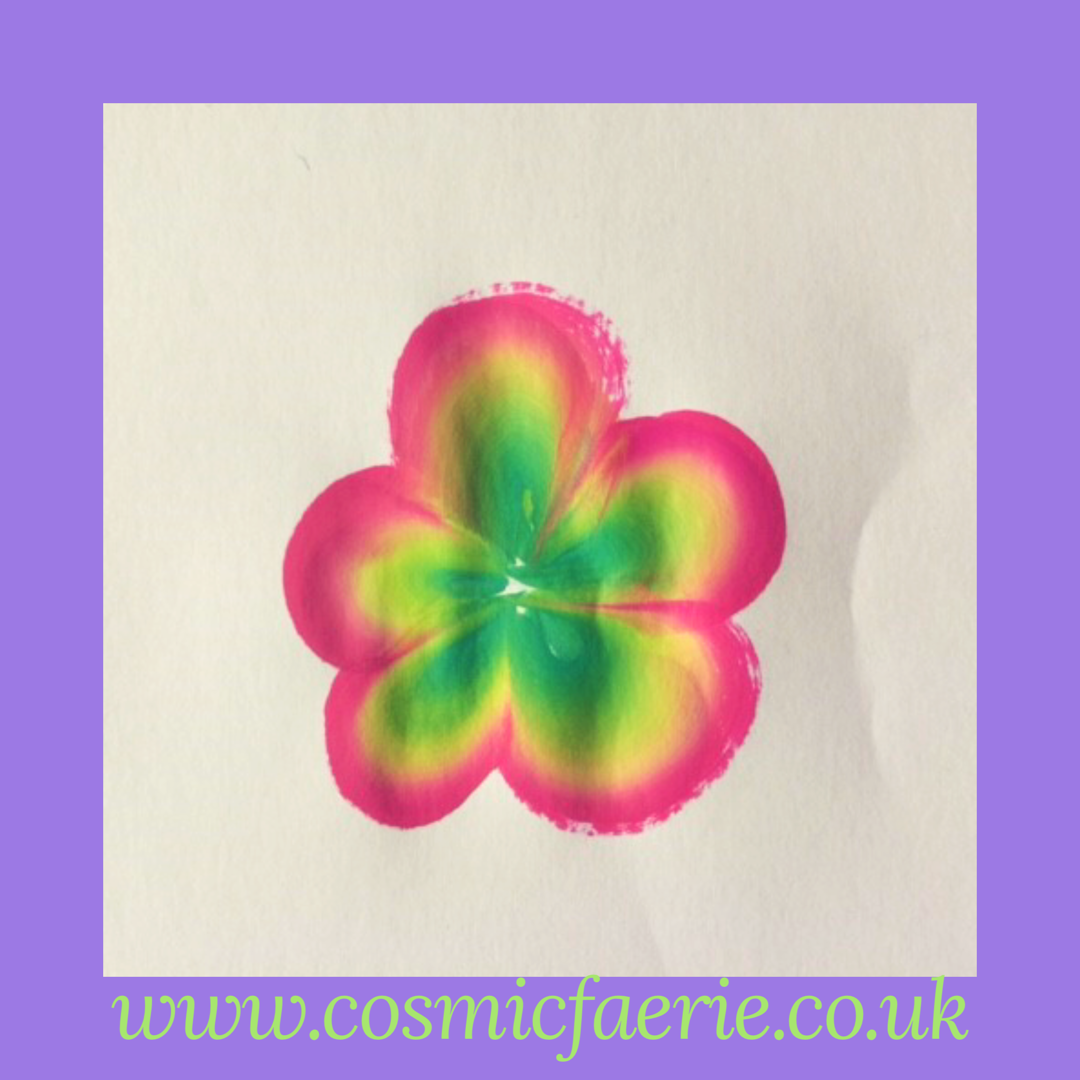
The simplest flowers to start with are double dip flowers. They look pretty once you get the shape and dimensions right, and can be used alone, added to other designs, and painted quickly for the little people in your seat that like to wriggle.
All you need to do is activate the 2 colours you would like to use. To do that wet a brush (I like to use a filbert brush for this), then start to move your brush around in the paint until you get a nice creamy consistency, like the one in the video below. Do the same for both colours.
https://youtu.be/Rn9wH9-zuTE
You then want to take your floral/petal/filbert/cats tongue brush and load it up with your first colour of paint.
Next wipe off the tip with a wet piece of kitchen towel or a flannel, and just dip the tip of the brush in to the second colour. Note that you will get a bit of the first colour mixed in to the second colour paint, all you need to do is wipe it out with a wet sponge once your design is complete.
Your brush should now have the first colour up the the farrell(the metal bit of the handle next to the bristles), with the second colour on the tip.
You then need to press the brush down to make your petal shape, with the coloured tip in the center. This shape will partially depend on the brush, and partially depend on how far you press the brush down and if you wiggle it around.
If you want a wider petal: wiggle the brush around in a circle shape, or place the brush back on top of itself slightly off to one side(see the picture below). Remember to make sure your petals also face toward one point in the middle, this is called your focus point.
If you want a smaller or larger petal: Press the farrell further down for a larger petal, or use just the tip for a smaller petal.
It is always best to work in 3’s, 5’s and 7’s. (Something Juliet from the Façade academy taught me on her awesome Flowers and Flourishes training day).
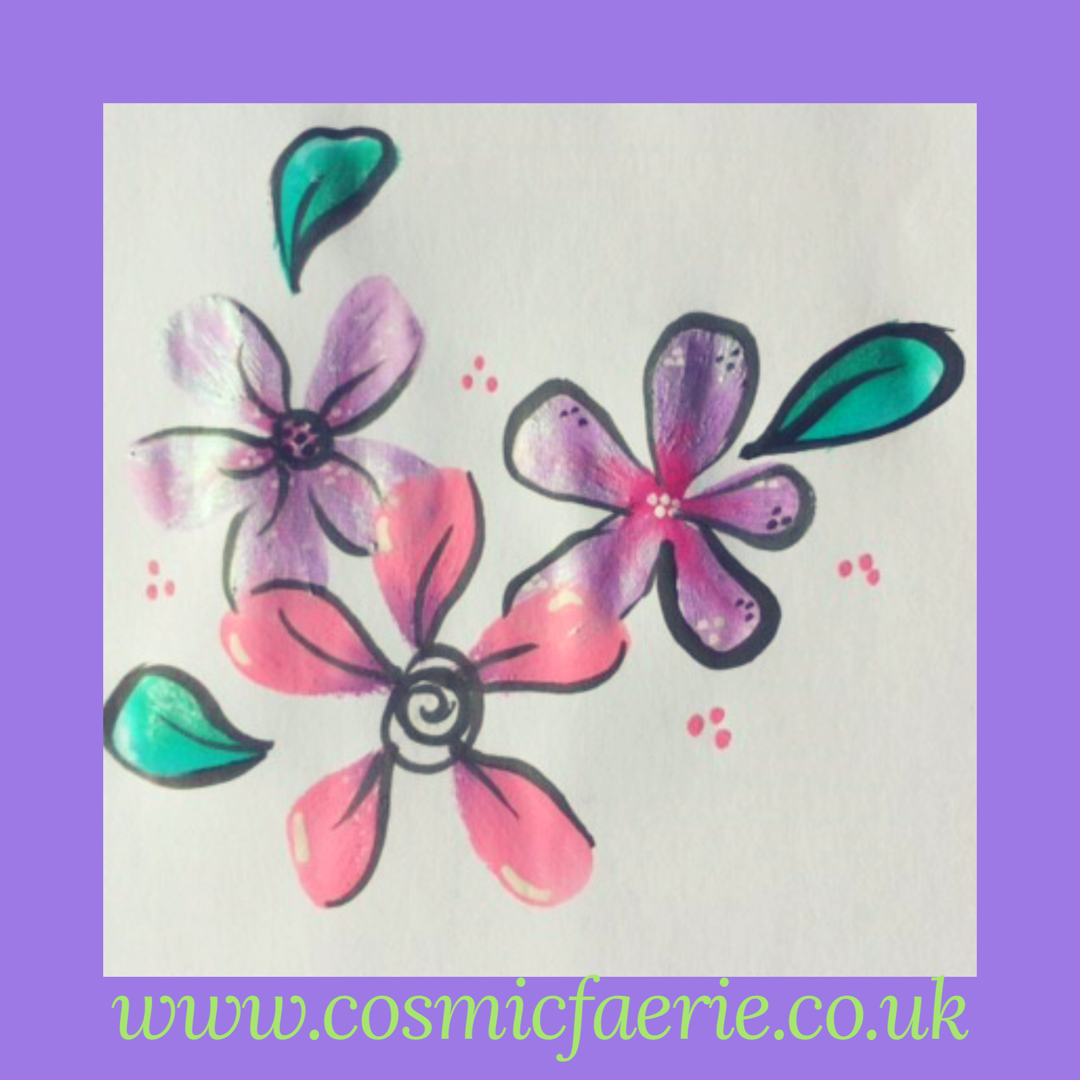
So now you have the basic flower, ta da! It doesn’t look like the masterpiece you want it to be, but it is a piece of it. Keep practising, add little dots and swirls to the centre of these. You could even dip your brush in to 2 contrasting greens and create some leaves too.
Once you get this down you can start adding some extras. Add black around your flowers, with white highlight or dots to make them ‘pop’ and stand out. You can do this using a small round brush such as a 1, 2 or 3. The yellow handled Lowel Cornells are my favourite, check them out here:
You could also use a liner brush for more swirly and whimsical lines, or make a beautiful rainbow with a one stroke cake .
You can see with this basic technique you can create really cute and colourful designs that look awesome, and are quick if you have a que of people, or are just getting to grips with your painting.
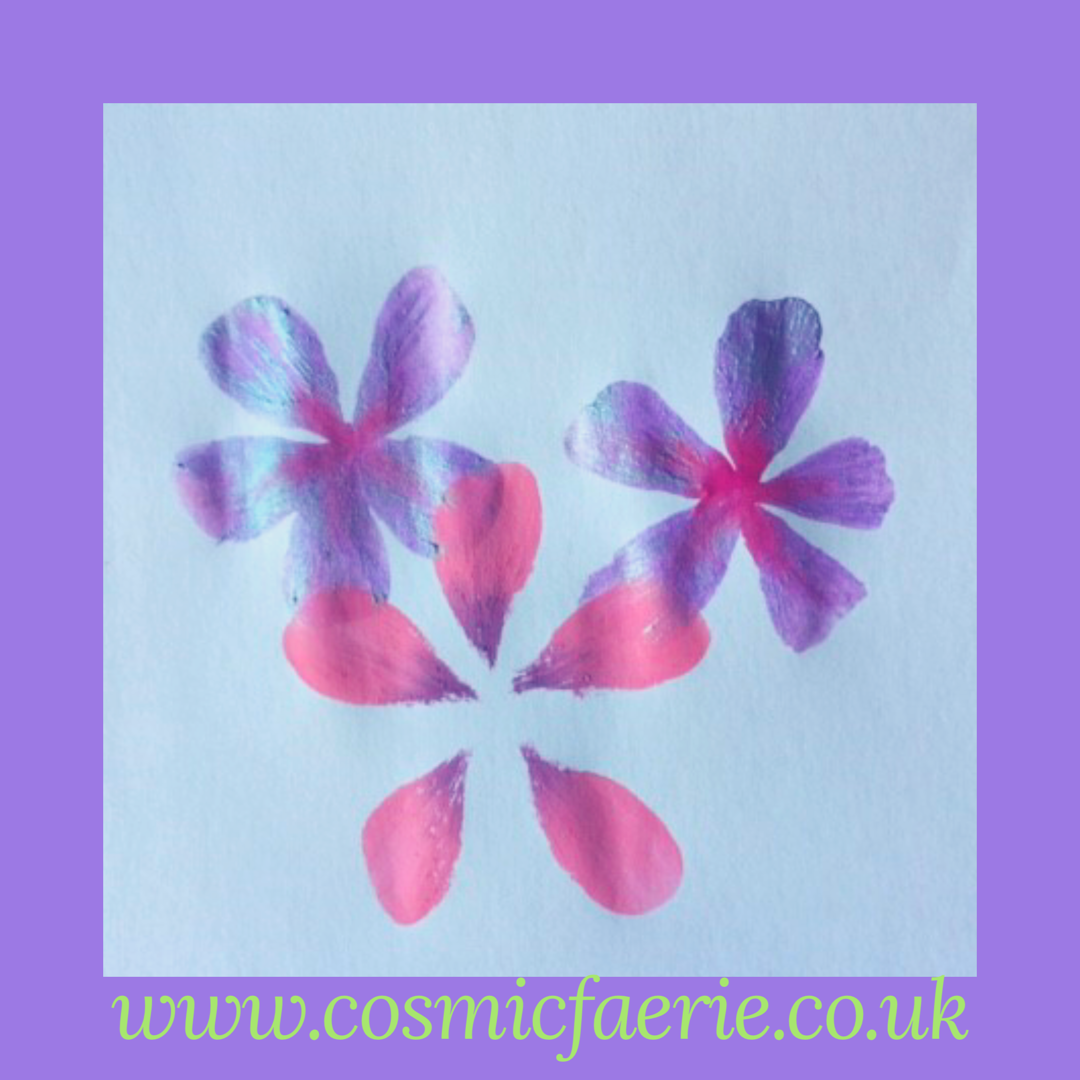
Another technique that looks awesome, and uses one strokes is making the petals with a flat brush.
These are one strokes, and can be found at all face painting shops. These are relatively new to the face painting world, but the majority of us LOVE THEM…..they are so colourful and pretty <3 <3 <3.
Well anyways, they make awesome flower petals! Like the flora brushes explored above, there are loads of options for flat brushes too. I would advise, if you do not already have any flat brushes, purchasing a ¾ inch flat brush. This can be straight or angled. I am finding I prefer the angled ones, but this is just down to personal preference. Maybe visit your local art shop to see what selection they have, you can just get a feel for how each would be to paint with.
Since making these I have purchased a 3/4 short angled brush fom The Face Painting Shop and I am really impressed with it. I originally purchased the 1 inch and loved it so much I got the 1/2 and 3/4 too. It holds water really well, but still has a thin tip, and is really sturdy. Check out the 3/4 inch flat brush here.
Once you have decided what brush you would like to use, load this up with your desired colour split cake. This is done by wetting your brush, tapping of the excess on a flannel or paper towel, and then moving the brush back and forth over the paint. Remember to keep your brush in line with the colours.
In order to make a petal shape you place the brush down keeping the inside on one point and moving the edge of the brush around in to a half circle shape, like this:
You then continue this make the 5 petals, again make sure your petals all come from a point in the middle. I sometimes go over mine a second time to try to balance them out a little, and spread the colours evenly. Obviously with practice, perfect placement will be one stroke with all colour perfectly even.
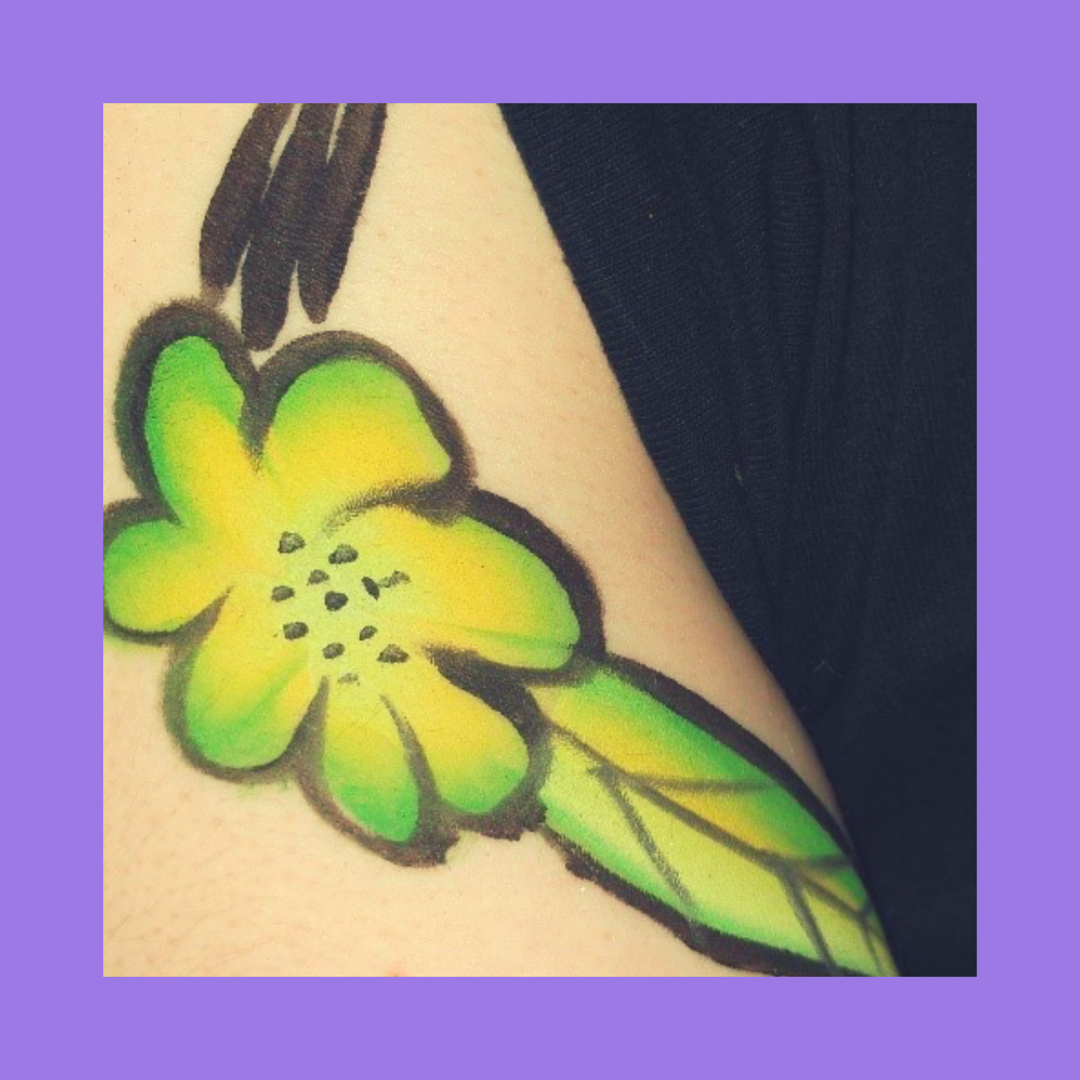
Like the double dip flowers, these look better when adding highlight, shade, some little dots in the middle or at certain points on the petals. Again, you can use this technique for adding leaves and foliage to you flowers and deigns too.
Here are a few examples that I have done this week. Experiment, with colour, glitter, highlights; the limit is only your imagination.
Thanks for reading, and remember this is only 2 very small examples out of a mass of amazing painted lowers out there. Check them out, pin them, add them to your inspiration folders, and play about incorporating them in to other designs.